How To Get Your Facebook Verified
In the age of social media, establishing your online presence has become more critical than ever. Whether you're a public figure, a business, or a content creator, having a verified Facebook account can boost your credibility and help you stand out in a crowded digital landscape. The blue verification badge next to your name not only adds a layer of authenticity to your profile but also ensures that your audience can trust your content. In this comprehensive guide, our digital marketing agency will walk you through the process of getting your Facebook account verified, step by step.
What Is a Facebook Verification Badge?
Before we dive into the process, let's clarify what a Facebook verification badge is. The blue verification badge is a symbol of authenticity that appears next to a user's name or page on Facebook. It signifies that Facebook has confirmed the identity of the account, which is particularly important for public figures, brands, and organizations. When people see the blue checkmark, they can be more confident that they are engaging with a legitimate and reputable profile.
Step-by-Step Guide to Getting Your Facebook Account Verified
Now that you understand what Facebook verification is and who is eligible, let's get started with the step-by-step guide on how to get your Facebook account verified.
Step 1: Log into Your Facebook Account
The first step is to log into the Facebook account that you want to get verified. You cannot verify a page or account if you're not the administrator or owner, so make sure you have the necessary access.
Step 2: Go to Facebook Settings
Once you're logged in, navigate to your settings by clicking on the small arrow in the upper-right corner of the screen and selecting "Settings & Privacy" from the dropdown menu.
Step 3: Access the Verification Request Form
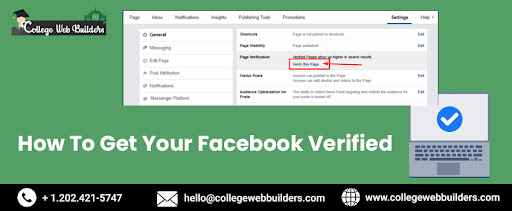
In the settings, click on "General" in the left-hand menu, and you'll find the option to "Page Verification." Click on it to access the verification request form.
Step 4: Start the Verification Process
Click on the "Edit" button next to the "Page Verification" section. A new window will appear, allowing you to start the verification process.
Step 5: Choose the Verification Type
You'll be presented with two options for verification:
- Verify this Page: If you're verifying a business page, this is the option you'll want to select. You'll need to provide a publicly listed phone number for your business, a business document (like a utility bill or business license), and an official website.
- Verify this Profile: If you're verifying a personal profile, this is the option for you. You'll need to submit an image of your government-issued ID (e.g., passport or driver's license).
Choose the option that best applies to you, and follow the instructions provided.
Step 6: Complete the Verification Process
Depending on the option you chose, complete the verification process by providing the necessary information and documents. Make sure you follow the instructions carefully and double-check all the information you submit. Accuracy is crucial in this step.
Step 7: Submit Your Request
After you've completed the verification process, click the "Submit" button. Your request will be reviewed by Facebook, and you will receive a response within a few days.
Step 8: Wait for Facebook's Response
Facebook will review your request and may contact you for additional information or clarification if needed. Be patient during this stage, as it can take some time for them to process the requests.
Step 9: Verify Your Email Address
You might be asked to verify your email address during the process. Make sure to do this promptly as it's an essential part of confirming your identity.
Step 10: Check for the Verification Badge
Once your request is approved, and Facebook has verified your account, you should see the blue verification badge next to your name or page. Congratulations, you're now a verified account on Facebook!
Who is Eligible for Facebook Verification
Obtaining a Facebook verification badge is a coveted symbol of authenticity, but not just anyone can request and receive this distinction. Facebook has established specific criteria to ensure that only deserving individuals, businesses, and entities can attain this recognition. While the eligibility requirements may evolve over time, the following are some common criteria that aspiring candidates should keep in mind:
- Authenticity: Facebook verification is reserved for accounts that authentically represent real individuals, legitimate businesses, or recognized entities. It is crucial that the account in question is not a parody, fan page, or the portrayal of a fictional character. This condition ensures that the verification badge maintains its credibility by associating only with genuine accounts.
- Uniqueness: To be considered for verification, your profile or page should possess a unique identity that sets it apart. Furthermore, it should have garnered a substantial following. Although the precise follower count required for verification is not publicly disclosed, it is generally in the thousands. This condition emphasizes that the verification badge is meant for profiles or pages with a noteworthy online presence.
- Completeness: A key aspect of eligibility is the completeness of your profile or page. To enhance your chances of receiving the verification badge, ensure that your account is thoroughly filled out. This includes having a profile picture, a cover photo, and relevant content that represents your persona or brand accurately. An incomplete or neglected account is less likely to meet Facebook's standards for verification.
- Notability: The final criterion for Facebook verification relates to the level of notability. In other words, the account or page seeking verification should be well-known and have a notable presence in the public eye. This is typically reserved for celebrities, public figures, established brands, influential individuals,
and organizations of high repute. The aim is to ensure that the verification badge is granted to those who have a genuine impact in their respective domains. Eligibility criteria for Facebook verification may vary by region, and they are subject to change over time. The social media platform adapts its standards to stay aligned with its evolving user base and the changing landscape of online presence, and so should digital marketing services.
Additional Tips for a Successful Verification for A Digital Marketing Company
- Ensure that your profile or page is up to date and complete with accurate information and images.
- Be patient. The verification process can take some time, and there's no guaranteed timeline for approval.
- Maintain an active and engaging presence on Facebook. Consistent posting and interaction with your audience can help build your credibility.
- If your verification request is denied, you can reapply after 30 days. Use the feedback provided to improve your application.
- Make sure your content complies with Facebook's policies and community standards. Any violations can hinder your chances of getting verified.
- If you encounter any issues during the verification process, you can contact Facebook's support for assistance.
Conclusion
Getting your Facebook account verified is a valuable step in establishing your online credibility and authenticity. While it may take some time and effort, following the steps outlined in this guide can increase your chances of successfully obtaining that coveted blue verification badge. Remember to meet the eligibility criteria, complete the verification process accurately, and maintain an active and engaging presence on Facebook to enhance your online reputation. Once you're verified, you'll have an extra layer of trust and recognition to help you shine in the digital world. Good luck with your verification journey! For more information or to avail services of our best digital marketing company in Ashburn USA, visit Collegewebbuilders.com .
- Tags: Marketing, Onlline, Internet


